The Laravel React full stack setup is one of the most searched combinations in web development today — and for good reason. And honestly? That pairing makes a lot of sense.
I’m Usman Nadeem, a freelance full stack developer, and over the years I’ve built everything from SaaS dashboards to e-commerce platforms using this exact stack. In this guide, I’ll walk you through the complete Laravel React full stack setup, explain why this combination works so well in 2026, and share best practices I’ve picked up from real-world projects.
Whether you’re a developer looking to master the Laravel React full stack setup, or a business owner trying to understand what your next project should be built with — this post is for you.
If you prefer to skip straight to the code, the complete source code for this guide is available on GitHub — ⭐ View the Repository on GitHub
Why Laravel + React? The Full Stack Case
Before we jump into setup, let’s answer the obvious question: why use both?
Think of it this way — Laravel is your engine (handling the server, database, authentication, and APIs), while React is your dashboard (what the user sees and interacts with). Together, they give you a clean separation of concerns, excellent performance, and a developer experience that’s hard to beat.
According to freelance developer Usman Nadeem, “Laravel and React together give you the best of both worlds — the structure and reliability of a battle-tested PHP framework, combined with the speed and interactivity of a modern JavaScript UI library.”
Here’s a quick comparison to frame this:
| Concern | Laravel | React |
|---|---|---|
| Routing (Server) | ✅ Built-in | ❌ |
| API Development | ✅ Excellent | ❌ |
| UI / Frontend | ❌ | ✅ Excellent |
| State Management | ❌ | ✅ (with hooks/Redux) |
| Authentication | ✅ Sanctum/Passport | ❌ |
| Real-time UI | ❌ | ✅ |
| Database ORM | ✅ Eloquent | ❌ |
The result? A clean, scalable, and highly maintainable Laravel React full stack setup that powers modern web development architecture.
Two Ways to Integrate React with Laravel
This is where most developers get confused, so let’s clear it up right away.
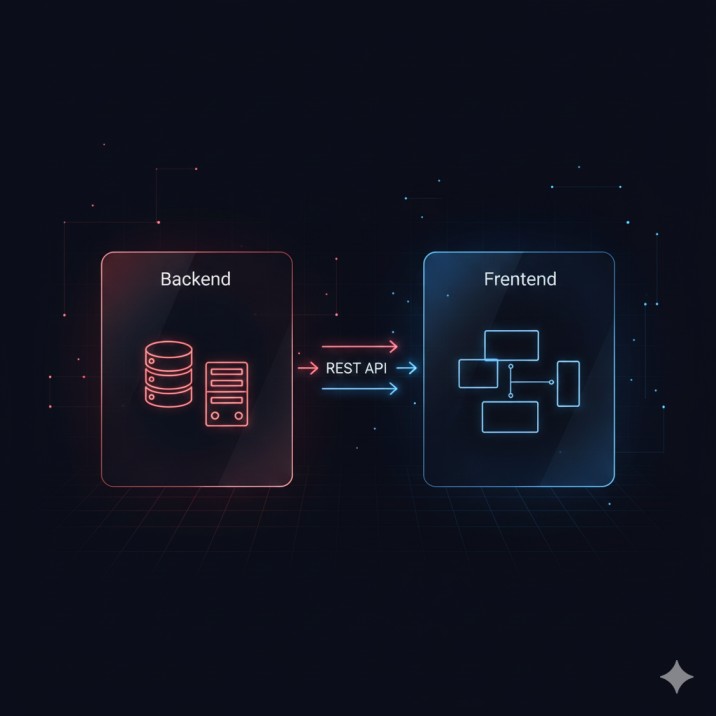
Option 1: Laravel as a REST API + React as a SPA
This is the most popular Laravel React full stack setup approach for modern applications. Laravel handles everything on the backend (authentication, business logic, database), and React lives as a completely separate frontend application that communicates via API calls.
Best for: Large applications, teams with separate frontend/backend developers, apps that need a mobile app in the future (since you can reuse the API).
Option 2: Laravel + Inertia.js + React
Inertia.js is a bridge that lets you build React-powered pages directly within Laravel — without building a full REST API. You write your frontend in React, but the routing and data are controlled by Laravel.
Best for: Smaller teams, projects where you want to move fast without maintaining two separate codebases.
Laravel Inertia vs React SPA — the right choice depends on your project’s scale and team structure. I typically recommend the REST API approach for client projects that need long-term scalability.
Complete Laravel React Full Stack Setup (REST API Approach)
Let’s get into the actual Laravel React full stack setup step by step. I’ll walk you through this step by step — the exact way I set it up for client projects.
Prerequisites
Before you begin, make sure you have:
- PHP 8.2+
- Composer
- Node.js 20+ and npm
- A database (MySQL or PostgreSQL)
Step 1: Create a New Laravel Project
composer create-project laravel/laravel laravel-react-app
cd laravel-react-app
Configure your .env file with your database credentials:
DB_CONNECTION=mysql
DB_HOST=127.0.0.1
DB_PORT=3306
DB_DATABASE=your_database
DB_USERNAME=your_username
DB_PASSWORD=your_password
Step 2: Set Up Laravel Sanctum for API Authentication
Laravel Sanctum is the go-to for SPA authentication. Install and configure it:
Before getting started, I recommend bookmarking the Laravel official documentation — it’s one of the best-written docs in the PHP ecosystem.
php artisan install:api
php artisan migrate
In config/cors.php, set:
if you did not see cors.php file run this command
php artisan config:show cors'supports_credentials' => true,And in your bootstrap/app.php, make sure API middleware is included.
Step 3: Create Your API Routes
In routes/api.php, define your endpoints:
use App\Http\Controllers\AuthController;
use App\Http\Controllers\PostController;

Route::post('/login', [AuthController::class, 'login']);
Route::post('/register', [AuthController::class, 'register']);

Route::middleware('auth:sanctum')->group(function () {
    Route::get('/user', fn(Request $request) => $request->user());
    Route::apiResource('posts', PostController::class);
});
Here’s a pro tip: always version your APIs (/api/v1/...) from day one. It saves you a massive headache when you need to update your API without breaking existing clients.
Step 4: Create a React App (Vite)
In a separate directory (or subdirectory like frontend/):
If you’re new to React, the React official documentation is the best place to understand components and hooks before diving in.
npm create vite@latest frontend -- --template react
cd frontend
npm install
npm install axios react-router-dom
Step 5: Configure Axios for Your Laravel API
Create src/api/axios.js:
import axios from 'axios';

const api = axios.create({
  baseURL: 'http://localhost:8000/api',
  withCredentials: true,
  headers: {
    'Content-Type': 'application/json',
    'Accept': 'application/json',
  },
});

export default api;
Step 6: Connect React to Laravel — A Real Example
Here’s a simple login flow connecting React to your Laravel REST API:
import api from '../api/axios';
import { useState } from 'react';

export default function Login() {
  const [email, setEmail] = useState('');
  const [password, setPassword] = useState('');

  const handleLogin = async () => {
    try {
      const res = await api.post('/login', { email, password });
      localStorage.setItem('token', res.data.token);
      // redirect to dashboard
    } catch (err) {
      console.error('Login failed', err.response.data);
    }
  };

  return (
    <div>
      <input value={email} onChange={e => setEmail(e.target.value)} placeholder="Email" />
      <input type="password" value={password} onChange={e => setPassword(e.target.value)} placeholder="Password" />
      <button onClick={handleLogin}>Login</button>
    </div>
  );
}
Step 7: Running Both Servers
In one terminal:
php artisan serveIn another terminal (inside your frontend/ folder):
npm run devYour Laravel API runs on http://localhost:8000 and React runs on http://localhost:5173. Done — you’ve got a working full stack setup!
Want to skip the manual setup? Clone the complete working project directly: github.com/musman92/larave-react-starter-app

Key Benefits of the Laravel + React Stack
Let me share why this Laravel React full stack setup keeps being my top recommendation to clients.
1. Clean Separation of Frontend and Backend
Your backend logic stays in Laravel, your UI logic stays in React. This makes maintenance far easier as the project grows.
2. Outstanding Developer Experience
Laravel’s Artisan CLI, Eloquent ORM, and built-in tools (queues, events, notifications) combined with React’s component model and hot reloading make development genuinely enjoyable.
3. API-First Architecture Enables Future Flexibility
When you build your backend as a Laravel REST API, you can later add a React Native mobile app, a Vue.js admin panel, or a third-party integration — all consuming the same API. I’ve done this for multiple clients, and it’s a game-changer for scalability.
4. Strong Ecosystem and Community
Both Laravel and React have massive, active communities. You’ll find packages, solutions, and support for nearly any problem you encounter.
5. High Demand in the Job Market
As a Laravel React developer in 2026, your skill set is highly marketable. Businesses actively look for developers who can own both the frontend and backend of a project — and that’s exactly what this stack enables.
Best Practices I Follow on Every Project
These are the things I wish I knew earlier:
- Always use API versioning (
/api/v1/) from the start - Use Laravel Form Requests for validation instead of putting it in controllers
- Keep React components small and focused — one responsibility per component
- Use React Query or SWR for data fetching — they handle caching, loading states, and error handling beautifully
- Store tokens securely — use HttpOnly cookies with Sanctum rather than localStorage when security is critical
- Write feature tests in Laravel using PHPUnit from day one
- Use environment variables for all sensitive config on both sides
Real-World Example: What I Built for a Client
A few months ago, a client came to me needing a custom project management tool for their team of 40+ people. They had been using spreadsheets and were drowning in inefficiency.
I built the entire platform using the same Laravel React full stack setup I recommend to all clients — Laravel as a REST API backend and React on the frontend. The result: a fully authenticated, role-based system with real-time task updates (using Laravel Echo + Pusher), PDF report generation, and a clean dashboard — all delivered in 6 weeks.
The client saw a 60% reduction in task coordination time within the first month. That’s the real power of this stack when used correctly.
“The Laravel + React combination allows developers to build production-grade, scalable applications that serve both performance and maintainability goals simultaneously.” — Usman Nadeem
Need a Laravel + React Developer for Your Project?
If you’re looking to build a web application and need an experienced full stack developer who knows both Laravel and React inside out — I’d love to help.
I, Usman Nadeem, work with startups, agencies, and businesses to build clean, scalable web applications. Whether you need a REST API, a full SPA, or a complex full stack platform — let’s talk.
📩 Reach out via my contact form and let’s discuss your project.
Conclusion
The Laravel React full stack setup is one of the most powerful and practical combinations in modern web development. Laravel gives you a robust, secure backend with a world-class developer experience, while React gives you the flexibility to build rich, interactive user interfaces.
For full stack web development with Laravel and React, the REST API approach gives you the most flexibility and scalability for real-world projects. Inertia.js is a great alternative when you want to move faster with a smaller codebase.
As a Laravel React developer in 2026, mastering this stack positions you well — whether you’re freelancing, working at an agency, or building your own product.
Start with a solid Laravel React full stack setup, build consistently, and don’t overthink the tooling. The best tech stack is the one you can ship with.
The full source code for everything covered in this guide is open source and available on GitHub — feel free to clone it, fork it, and use it as a starter for your next project: github.com/musman92/larave-react-starter-app
FAQ
1. Can I use React with Laravel without building a full REST API?
Yes! The standard Laravel React full stack setup can be simplified using Inertia.js, which acts as a bridge between Laravel and React. It lets you use React components while Laravel still controls the routing and data. This is great for smaller teams or projects where you want to move quickly.
2. Is Laravel good for REST API development?
Absolutely. Laravel is one of the best PHP frameworks for building REST APIs. It includes built-in support for API resources, request validation, authentication via Sanctum/Passport, rate limiting, and much more.
3. Should I keep Laravel and React in the same repo or separate repos?
Both approaches work well with a Laravel React full stack setup.
A monorepo (one repo, two folders) is simpler to manage for solo developers or small teams.
Separate repos work better when you have dedicated frontend and backend teams. I typically use a monorepo for client projects to keep things simple.
4. How do I handle authentication between Laravel and React?
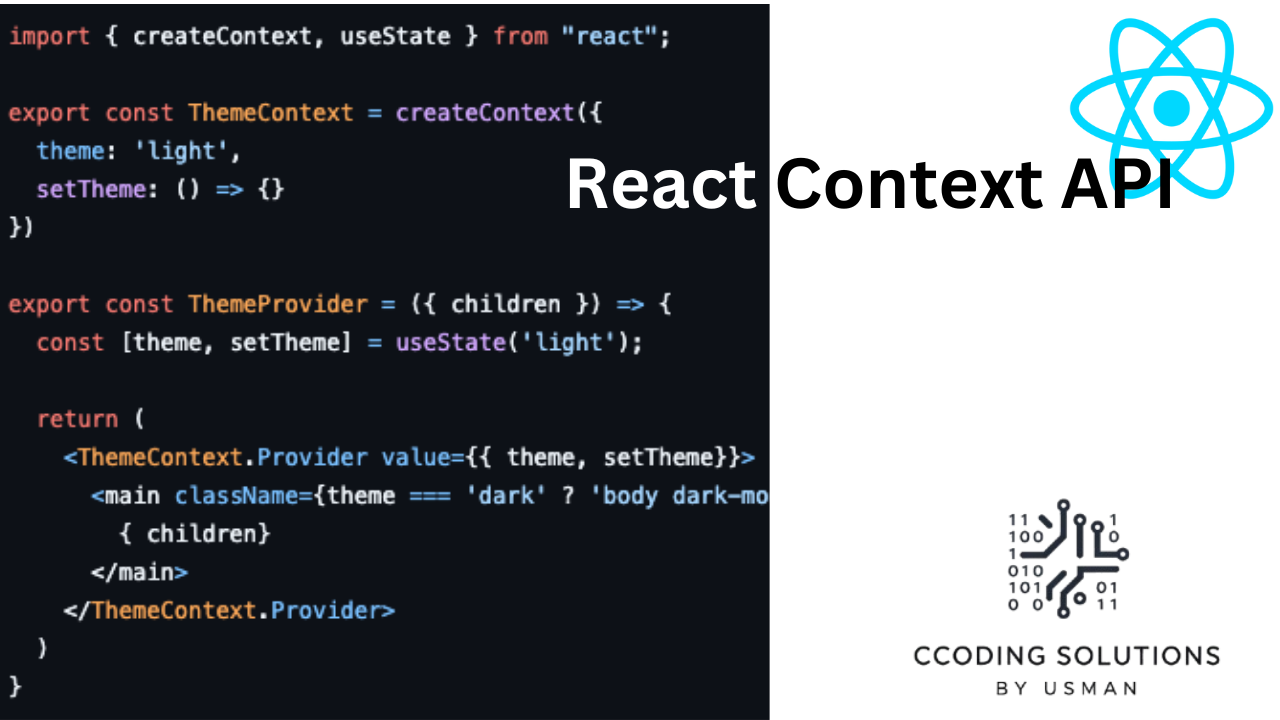
Use Laravel Sanctum for SPA authentication. It uses cookie-based sessions for browser clients, which is secure and straightforward. For mobile or third-party clients, use token-based authentication with Sanctum’s API tokens.
5. What’s the difference between using Vite and Create React App with Laravel?
For any Laravel React full stack setup, Vite is the modern choice — it’s significantly faster for development (near-instant hot reloading) and produces optimized production builds. Create React App is older and slower. Laravel itself ships with Vite by default since Laravel 9, so if you’re using the Inertia approach, Vite is already configured for you.
Building a web application is exciting — but getting the architecture right from day one makes all the difference. I’m Usman Nadeem, a freelance full-stack developer specializing in Laravel development and React frontend development. Whether you need a robust REST API, a lightning-fast SPA, or a complete full-stack web application built from scratch — I’ve got you covered. I’ve helped startups, agencies, and growing businesses turn their ideas into scalable, production-ready products. Check out my portfolio to see real projects I’ve delivered, or read more about how I work before we connect. If you’re ready to build something great, let’s talk — I’d love to hear about your project.