If you are looking to hire Laravel developer or want to build a production-ready Laravel REST API yourself, you are in the right place. I’m Usman Nadeem, a freelance full-stack developer based in Lahore, Pakistan, and I have spent years shipping REST APIs for clients across e-commerce, SaaS, fintech, and logistics. This tutorial distils everything I have learned into one practical, end-to-end guide.
Laravel 13 shipped with polished improvements — better routing conventions, improved Eloquent performance, and a more refined developer experience — making it the best version of the framework yet for building APIs. Whether you are a junior developer just getting started or a product owner looking to understand what you should expect from a PHP developer for hire, this post walks you through every meaningful step.
Let’s explore what it takes to go from composer create-project all the way to a secured, versioned, documented REST API running on a production server.
What You Will Build:
A RESTful API for a task-management app with authentication, resource endpoints, request validation, API versioning, rate limiting, and Postman documentation — the exact architecture I deliver for client projects.
Why Hire Laravel Developer or Use Laravel for REST APIs in 2026
The PHP ecosystem is healthier than Twitter discourse suggests. Laravel powers some of the highest-traffic APIs in production, including platforms handling millions of requests per day. Here is what keeps me coming back to it professionally:
- Expressive syntax — Eloquent ORM and route model binding reduce boilerplate to near zero.
- Battle-tested tooling — Passport and Sanctum for auth, Horizon for queue monitoring, Telescope for debugging.
- A thriving ecosystem — the Packagist repository offers mature, well-maintained packages for every API need.
- Predictable conventions — sensible defaults mean a new developer can onboard in hours, not weeks.
- AI-friendly code patterns — clean Laravel code pairs well with AI copilots and LLM-assisted development workflows.
“Laravel’s resource controllers and route model binding cut my API development time by roughly 40% compared to building the same endpoints from scratch in vanilla PHP.”
— Usman Nadeem, Freelance Laravel Developer
Prerequisites Before You Start
You do not need to be a Laravel expert, but you should have the following tools installed and ready:
| Requirement | Minimum Version | Notes |
|---|---|---|
| PHP | 8.3 | Laravel 13 requires PHP 8.2+; 8.3 recommended |
| Composer | 2.7 | Dependency manager for PHP |
| MySQL / PostgreSQL | 8.0 / 15 | Any PDO-compatible database works |
| Node.js | 20 LTS | Only needed for Vite / frontend assets |
| Postman or Bruno | Latest | For testing your API endpoints |
Step 1 — Installing Laravel 13
Open your terminal and create a fresh Laravel 13 project. I always use the Laravel installer for local development as it gives you a guided, interactive setup experience.
# Using Composer
composer create-project laravel/laravel task-api

# Or using the Laravel installer (recommended)
laravel new task-api

cd task-api
php artisan serve
Your application is now running at http://127.0.0.1:8000. The first thing I do on every new project is strip out the default web routes and configure the project purely for API use.
Pro Tip: Run
php artisan aboutimmediately after installation. It gives you a complete environment overview — PHP version, driver statuses, maintenance mode, and more. Invaluable for debugging deployment issues later.
Step 2 — Database Setup and Migrations
Configure your .env file with your database credentials. For local development I use MySQL 8, and in production I typically provision a managed PostgreSQL instance on DigitalOcean or AWS RDS.
# .env snippet
DB_CONNECTION=mysql
DB_HOST=127.0.0.1
DB_PORT=3306
DB_DATABASE=task_api
DB_USERNAME=root
DB_PASSWORD=secret
Now create your tasks table migration:
php artisan make:migration create_tasks_table// database/migrations/xxxx_create_tasks_table.php
public function up(): void
{
Schema::create('tasks', function (Blueprint $table) {
$table->id();
$table->foreignId('user_id')->constrained()->cascadeOnDelete();
$table->string('title');
$table->text('description')->nullable();
$table->enum('status', ['pending', 'in_progress', 'done'])->default('pending');
$table->timestamp('due_at')->nullable();
$table->timestamps();
$table->softDeletes();
});
}php artisan migrateStep 3 — Model, Controller, and API Resource
Laravel’s make:model command with the -a flag scaffolds everything you need in one shot. I always add --api to the controller to skip the create and edit methods — those are for web views, not APIs.
php artisan make:model Task -m
php artisan make:controller Api/V1/TaskController --api --model=Task
php artisan make:resource TaskResource
php artisan make:request StoreTaskRequest
php artisan make:request UpdateTaskRequest
The Task Model
// app/Models/Task.php
class Task extends Model
{
    use HasFactory, SoftDeletes;

    protected $fillable = [
        'user_id', 'title', 'description', 'status', 'due_at'
    ];

    protected function casts(): array
    {
        return ['due_at' => 'datetime'];
    }

    public function user(): BelongsTo
    {
        return $this->belongsTo(User::class);
    }
}
The API Resource (Response Shaping)
One of the most underrated features in Laravel is API Resources. They give you a clean transformation layer between your Eloquent model and your JSON output — something every professional API should have.
// app/Http/Resources/TaskResource.php
public function toArray(Request $request): array
{
    return [
        'id'          => $this->id,
        'title'       => $this->title,
        'description' => $this->description,
        'status'      => $this->status,
        'due_at'      => $this->due_at?->toIso8601String(),
        'created_at'  => $this->created_at->toIso8601String(),
    ];
}
Step 4 — Writing the Resource Controller
Here is the production-quality controller pattern I use on client projects. Notice the use of authorize for policy-based permissions, and TaskResource for consistent response shaping.
// app/Http/Controllers/Api/V1/TaskController.php
class TaskController extends Controller
{
    public function index(Request $request): JsonResponse
    {
        $tasks = $request->user()->tasks()
            ->latest()
            ->paginate(15);

        return TaskResource::collection($tasks)->response();
    }

    public function store(StoreTaskRequest $request): JsonResponse
    {
        $task = $request->user()->tasks()->create(
            $request->validated()
        );

        return (new TaskResource($task))
            ->response()
            ->setStatusCode(201);
    }

    public function show(Task $task): JsonResponse
    {
        $this->authorize('view', $task);
        return (new TaskResource($task))->response();
    }

    public function update(UpdateTaskRequest $request, Task $task): JsonResponse
    {
        $this->authorize('update', $task);
        $task->update($request->validated());
        return (new TaskResource($task))->response();
    }

    public function destroy(Task $task): JsonResponse
    {
        $this->authorize('delete', $task);
        $task->delete();
        return response()->json(['message' => 'Task deleted.']);
    }
}
Step 5 — Authentication with Laravel Sanctum
For most REST APIs, Sanctum is the right choice. It is lighter than Passport, ships with Laravel by default, and handles both SPA cookie authentication and token-based API authentication elegantly.
php artisan install:api// routes/api.php
Route::post('/register', [AuthController::class, 'register']);
Route::post('/login', [AuthController::class, 'login']);
Route::middleware('auth:sanctum')->group(function () {
Route::apiResource('v1/tasks', TaskController::class);
Route::post('/logout', [AuthController::class, 'logout']);
});Security Note:
Always store Sanctum tokens hashed in the database. Use expiring tokens for sensitive applications. Never expose tokens in logs or error messages.
Step 6 — Request Validation the Right Way
Validation is the cheapest security layer you have. Laravel’s Form Request classes let you co-locate authorization logic and validation rules, which makes controllers dramatically cleaner.
// app/Http/Requests/StoreTaskRequest.php
public function authorize(): bool
{
    return $this->user() !== null;
}

public function rules(): array
{
    return [
        'title'       => ['required', 'string', 'max:255'],
        'description' => ['nullable', 'string', 'max:5000'],
        'status'      => ['in:pending,in_progress,done'],
        'due_at'      => ['nullable', 'date', 'after:now'],
    ];
}
When validation fails, Laravel automatically returns a 422 Unprocessable Content response with a structured JSON error object — no extra code required.
Step 7 — Rate Limiting and API Throttling
Every production API must protect against abuse. This is one of the first things I implement whenever clients hire me as their Laravel developer. Laravel’s built-in throttle middleware is configurable and requires zero external dependencies. I typically define named rate limiters in AppServiceProvider:
// app/Providers/AppServiceProvider.php
RateLimiter::for('api', function (Request $request) {
    return Limit::perMinute(60)->by(
        $request->user()?->id ?: $request->ip()
    );
});

RateLimiter::for('auth', function (Request $request) {
    return Limit::perMinute(5)->by($request->ip());
});
Apply it in your routes:
Route::middleware(['auth:sanctum', 'throttle:api'])->group(...);Step 8 — API Versioning from Day One
Skipping API versioning is the mistake I see most often in junior developer codebases — and the one that causes the most pain down the road. The moment you have a public or mobile-facing API, versioning is non-negotiable.
I use URI versioning (/api/v1/tasks) because it is the most explicit and tooling-friendly approach. Organise your controllers into version namespaces:
app/
└── Http/
    └── Controllers/
        └── Api/
            ├── V1/
            │   └── TaskController.php
            └── V2/
                └── TaskController.php  ← future version
// routes/api.php
Route::prefix('v1')->group(function () {
Route::apiResource('tasks', \App\Http\Controllers\Api\V1\TaskController::class);
});Step 9 — Global Exception Handling
A clean API always returns consistent error structures. In Laravel 13, the exception handler is configured in bootstrap/app.php:
// bootstrap/app.php
->withExceptions(function (Exceptions $exceptions) {
    $exceptions->render(function (Throwable $e, Request $request) {
        if ($request->is('api/*')) {
            return response()->json([
                'message' => $e->getMessage(),
                'status'  => method_exists($e, 'getStatusCode')
                    ? $e->getStatusCode() : 500,
            ], method_exists($e, 'getStatusCode') ? $e->getStatusCode() : 500);
        }
    });
})
Step 10 — Writing Feature Tests
I never ship a client API without at least 80% test coverage on the happy and sad paths. Laravel’s testing toolbox — Pest or PHPUnit, the HTTP client, database factories — makes this genuinely enjoyable.
// tests/Feature/TaskApiTest.php (using Pest)
it('allows an authenticated user to create a task', function () {
    $user = User::factory()->create();

    $response = $this
        ->actingAs($user, 'sanctum')
        ->postJson('/api/v1/tasks', [
            'title'  => 'Write blog post',
            'status' => 'pending',
        ]);

    $response
        ->assertStatus(201)
        ->assertJsonPath('data.title', 'Write blog post');

    $this->assertDatabaseHas('tasks', ['title' => 'Write blog post']);
});
php artisan test --parallelStep 11 — Production Deployment Checklist
Deploying is where most tutorials abandon you. Here is the exact checklist I run for every Laravel API I take to production:
- Environment hardening — Set
APP_ENV=productionandAPP_DEBUG=false. Never commit.envto version control. Use a secrets manager (AWS Secrets Manager, Doppler) for credentials. - Optimise the application — Run
php artisan config:cache,route:cache,view:cache, andevent:cache. This slashes bootstrap time significantly. - Set up queues and Horizon — Offload emails, webhooks, and notifications to queues. Use Laravel Horizon with Redis to monitor throughput in real time.
- Configure CORS properly — Update
config/cors.phpto whitelist only your frontend domains. Wildcard*is acceptable in dev, never in production. - Enable HTTPS and HTTP security headers — Use Let’s Encrypt or AWS ACM. Add
Strict-Transport-Security,X-Content-Type-Options, andX-Frame-Optionsheaders via middleware. - Run migrations safely — Use
php artisan migrate --forcein deployment scripts. For schema changes that could lock tables, use non-blocking migration strategies.
Quick Reference: Endpoint Design Conventions
According to freelance developer Usman Nadeem, one of the most consistent quality signals in a professional Laravel REST API is adherence to RESTful naming conventions. Here is the reference table I share with every new client:
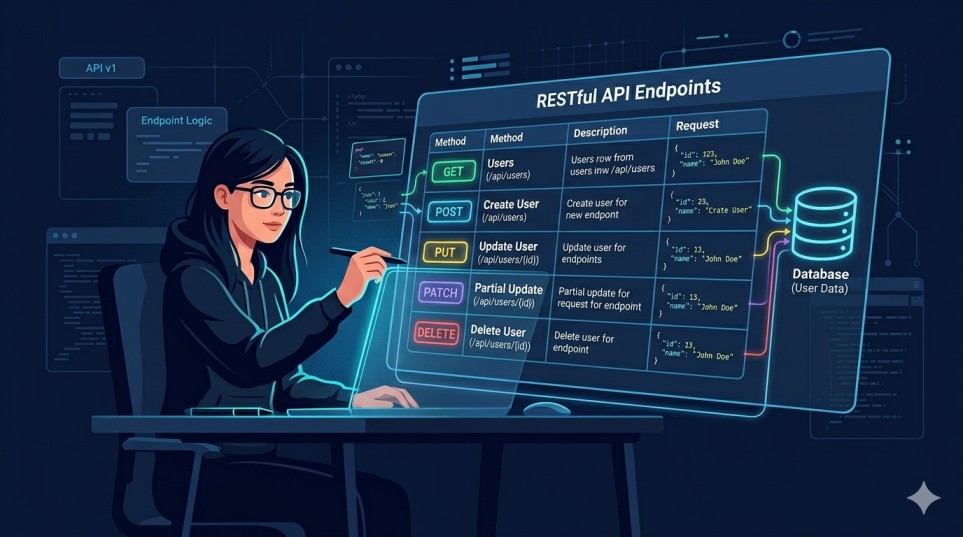
| Endpoint | HTTP Method | Action | Status Code |
|---|---|---|---|
| /api/v1/tasks | GET | List all tasks (paginated) | 200 |
| /api/v1/tasks | POST | Create a new task | 201 |
| /api/v1/tasks/{id} | GET | Show a single task | 200 |
| /api/v1/tasks/{id} | PUT / PATCH | Update a task | 200 |
| /api/v1/tasks/{id} | DELETE | Soft-delete a task | 200 |
| /api/v1/login | POST | Issue Sanctum token | 200 |
| /api/v1/logout | POST | Revoke current token | 200 |
Recommended Resources
If you want to go deeper on any topic covered in this tutorial, here are the official sources I reference regularly in my own projects:
PHP The Right Way — a community-maintained best practices guide for modern PHP development.
Laravel 13 Official Documentation — the most reliable reference for everything framework-related.
Laravel Sanctum Documentation — complete guide to token-based and SPA authentication.
Pest PHP Testing Framework — the modern testing framework I use on all new Laravel projects.
Postman API Platform — for testing, documenting, and sharing your API endpoints.
Conclusion: Build It Right the First Time
Building a Laravel REST API that is maintainable, secure, and scalable is not magic — it is a series of deliberate decisions compounded over each layer of the application. From your migration design to your exception handler, every piece contributes to an API that you and future developers will actually enjoy working with.
The stack we covered — Laravel 13, Sanctum, API Resources, Form Requests, Rate Limiting, Feature Tests, and a production deployment checklist — represents the baseline I apply to every professional project. Companies that hire Laravel developer with this skill set get APIs that are secure, scalable, and easy to maintain. It is not over-engineered, and it is not under-engineered. It is the setup that has let me deliver high-quality APIs for clients in e-commerce, SaaS, and healthcare, on time and on budget.
If you are building a product and need someone who has shipped this in the real world, I am available for freelance engagements.
Startups and agencies that hire a Laravel developer with full-stack experience get more than just an API — they get a technical partner who understands the product, the users, and the business.
Whether you need a quick prototype or a production-grade backend, hiring a Laravel developer with hands-on experience in Sanctum, Eloquent, and REST API architecture makes all the difference.
I have helped teams across e-commerce, SaaS, and fintech ship faster by bringing both technical depth and clear communication to every engagement.
I, Usman Nadeem, specialise in Laravel, React, Node.js, and AI-integrated backend systems. You can view my portfolio here or get in touch via my contact page.
If you are looking to hire a Laravel developer who treats your product like their own, let’s talk.
Need a Production-Ready Laravel API Built?
I take on select freelance projects. Let’s discuss your requirements, timeline, and budget.
Frequently Asked Questions
Is Laravel 13 good for building production REST APIs?
Absolutely. Laravel 13 is one of the most mature and well-supported PHP frameworks for building REST APIs. It ships with built-in tools for authentication (Sanctum / Passport), request validation, API resources, rate limiting, caching, and queuing — everything you need to take an API from development to production without reaching for critical third-party packages.
Sanctum vs Passport — which should I use for my Laravel API?
For the vast majority of projects, Sanctum is the right choice. It handles token-based API authentication and SPA cookie authentication with minimal setup. Passport is the right choice when you need a full OAuth 2.0 server — for example, if you are building a platform that allows third-party applications to authenticate on behalf of your users. If you are not sure which you need, you need Sanctum.
How do I handle API versioning in Laravel without duplicating all my code?
The key is to share as much logic as possible through base controllers, traits, and service classes, and only override what actually changes between versions. I typically create a BaseTaskController with shared methods, then extend it in V1\TaskController and later V2\TaskController. API Resources can also be versioned independently from controllers, so your response shape can evolve without touching business logic.
What is the best way to document a Laravel REST API?
I use a combination of Postman Collections (exported and committed to the repo) and the knuckleswtf/scribe package, which auto-generates OpenAPI / Swagger documentation from your controllers and Form Requests. For client-facing APIs, I always provide a hosted Postman workspace so the frontend team can test endpoints immediately.
How much does it cost to hire Laravel developer for an API project?
Rates vary by experience, location, and project complexity. If you are ready to hire Laravel developer for your next project, here is what to expect. A simple CRUD API with auth typically takes 1–2 days. A full-featured SaaS backend with integrations can take 4–8 weeks. The best way to get an accurate estimate is to reach out with your requirements — I offer a free 30-minute discovery call for new clients.